Commanding a Planet
<tooltip text="Obtaining a Planet Summary">Obtaining a Summary of a Planet, Fleet or other Object
To just obtain a summary of a specific planet, fleet or other object, left-click once on the object in the Scanner. A small yellow selection arrow appears under the object you select. The status bar under the Scanner pane displays the name of the object, and the distance from the object in the Command pane. The Selection Summary pane changes to display what you know about the selected object.
You can also use the View (Find) menu item to locate a fleet or planet and display its summary.</tooltip>
The Command pane is the command interface for each of your planets and fleets. When you select a planet to command, tiles for assigning planet-specific orders fill the pane.
To learn more about a tile, click on the picture.
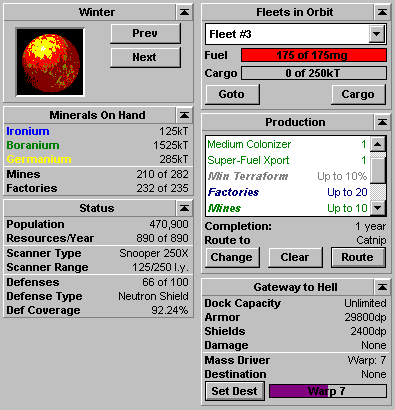
Planet tile

Click on Prev and Next to scroll through your planets in the order they are listed in the Planet Summary Report. Hold down on the SHIFT key while clicking on Prev or Next to scroll between planets that have a starbase.
Minerals on Hand tile

Status tile

|
This tile displays planetary population, scanner and defense statistics.
|
Learn more about:
Fleets in Orbit tile

Click on Cargo to transfer cargo between your fleets and the planet.
Click on Goto to bring the specified fleet under command.
Small screen layout: click on the Cargo button to display the cargo list.
Production tile

|
This tile displays the planet's production queue. Colors in the queue show completion status:
Auto build items are in italics. Click on Change to alter production orders. Click on Clear to remove everything from your production queue. Minerals and resources expended on partially completed items are not recoverable. Click on Route, then click on a planet in the scanner to send all newly built ships to that planet. Alternately, CTRL-click in the Scanner on the destination planet. |
Read more about:
Starbase tile

|
This tile describes the local starbase, if any, and its mass driver.
To target the mass driver, click on Set Dest and then click on the destination in the scanner. Left-click and drag in the gauge to set the packet speed. The warp specified is the maximum safe speed. The gauge color is purple as long as the speed is safe, changes to yellow when the speed is over the limit, and then to red when the maximum decay rate is reached. |
Learn about: